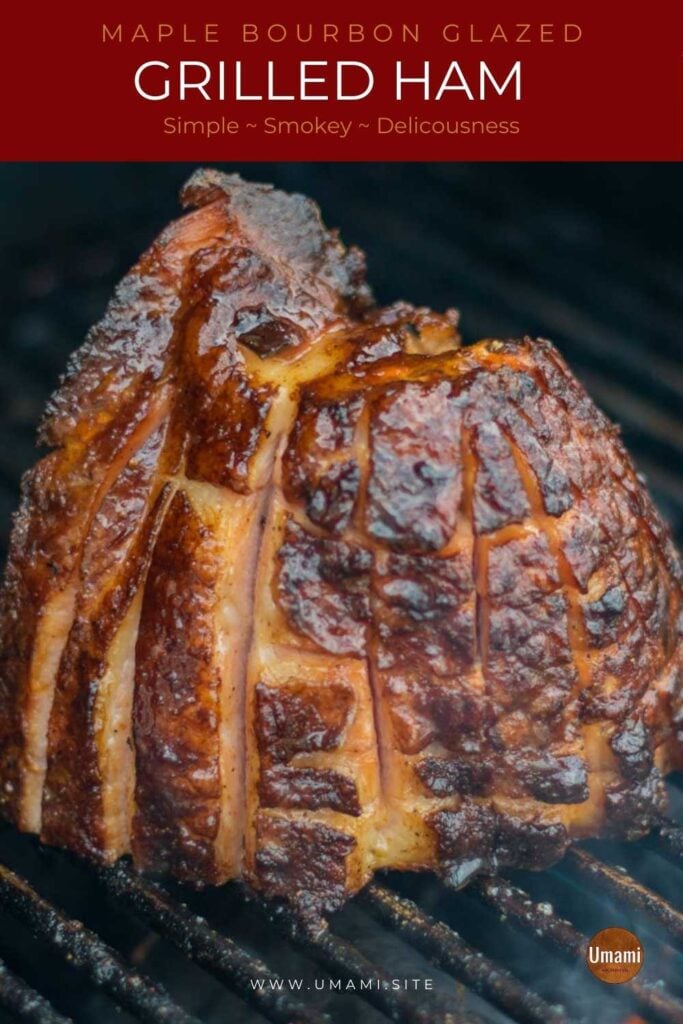
Maple Bourbon Glazed Grilled Ham

There are a lot of great reasons to grill a ham, grilling lets you add flavors by using a dry rub and glaze, it concentrates the ham’s natural flavor and juices while giving it a delicious, slightly smoky flavor, and a crisp crust.
This grilled ham recipe has everything you need to learn how to grill a ham that is both tender and delicious. In this piece you’ll learn how to pick the right ham, prep it for the grill, infuse it with the flavors using a dynamite dry rub, and crisp everything up with a warm bourbon glaze.
This recipe works equally well on a gas or charcoal grill and can also be done in the oven or a smoker. If you’re cooking it in the oven, make sure to set the ham on a baking sheet lined with aluminum foil.
Picking the Right Ham for the Grill
The traditional definition for ham is a pork leg that has been preserved through salting, smoking, or wet curing. Truly a global ingredient, ham plays an integral role in cuisines from around the world. A few of the more famous hams include Jamón Serrano from Spain, Black Forest Ham from Germany, and Jinhua Ham from China. A common thread with hams across cuisines is the role they play in celebrations and as a key ingredient in comfort food.
The most common type of ham found in the United States is city hams, which is a brine-cured ham that is generally referred to as ham, is what is widely available at grocery stores, and needs to be refrigerated. Country hams which are dry-cured and smoked are also popular, especially in the south, and are often served in thin slices similar to Serrano and other aged European hams.
The best ham for grilling is a bone-in ham without anything added to it. Boneless hams with natural juices are also delicious and a bit easier to slice for sandwiches.
When it comes to portion size a good rule of thumb is 1/3 of a pound per person for parties and 1/2 pound per person for dinners or as a main course. When choosing a bone-in ham always go slightly larger to account for the bone and don’t worry too much about extras because very few things in this world make better leftovers than a beautifully grilled ham.
The reason we prefer bone-in hams is the bone gives the ham a richer, deeper flavor. It’s also often the sign of higher quality ham and looks amazing as it’s being sliced and served. It can also be used to flavor stocks and stews and is fantastically simmered in a pot of beans. Spiral hams can work on the grill but tend to be messier and dry out easier than bone-in.
This recipe is for cured hams, not fresh ham or what is sometimes referred to as a picnic ham, which comes as raw pork. That requires extra cooking time to make sure it’s cooked all the way through and because it hasn’t been cured will end up tasting more like a pork roast.
Grilling Ham
It’s easy to learn how to grill ham. The keys to cooking a delicious ham on the grill are to use a dry rub to add flavor, a glaze to improve texture, and indirect heat to avoid drying it out.
Far too often ham ends up as one of those things people are indifferent to because they’re used to eating it warmed up in the oven or as something that comes in a plastic case from the grocery store. Using the grill changes that by concentrating the ham’s natural flavors and bringing its inherent smokiness out.
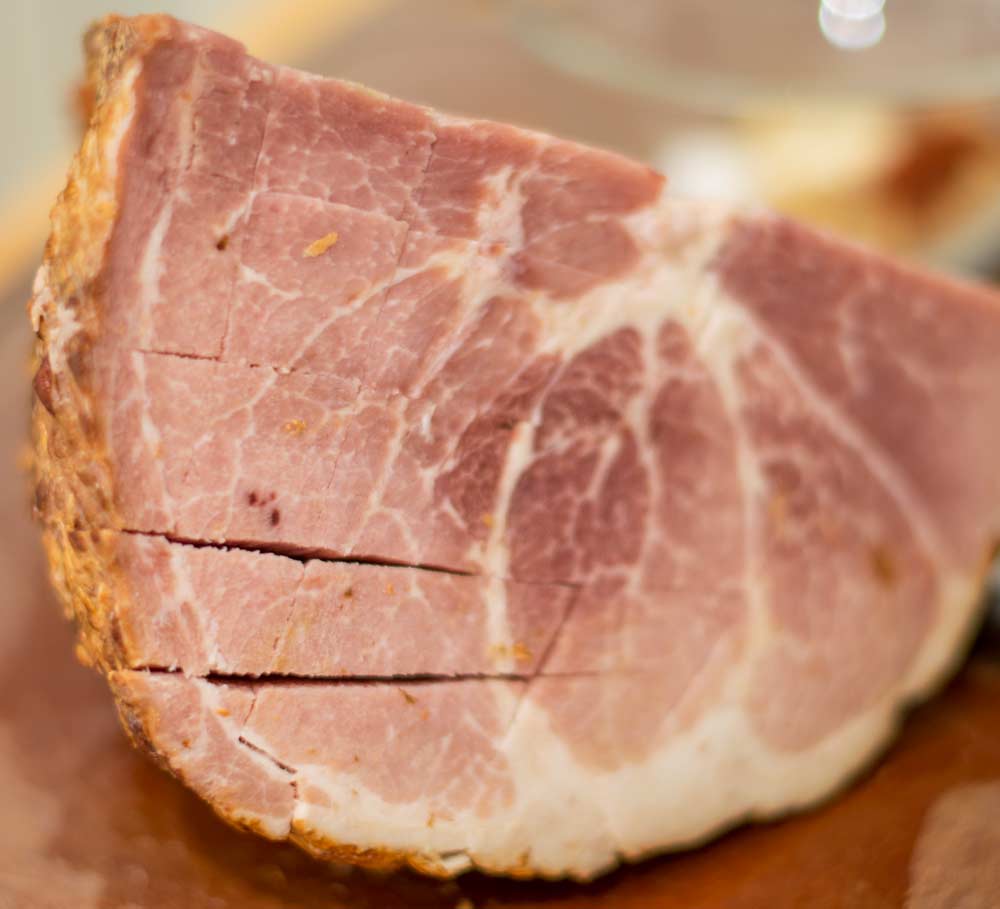
The first step is to prep the ham by cutting a diamond pattern into the outside. This will allow the flavors from the dry rub to penetrate into the meat as it cooks on the grill.
Using a sharp knife make a series of long 1/2 inch deep cuts across the ham, turning it 90 degrees and repeating the process to create interlocking cuts with a diamond shape.
One of the things that makes ham so unique is how it takes on flavors from rubs and glazes without losing sight of itself. This is one of the reasons why it is so popular around the world and there are so many distinct styles.
The dry rub for this recipe uses the classic flavors in smoked paprika, mustard powder, brown sugar, and garlic powder to add some sweetness and smokiness to the ham. It’s ok to add a small amount of salt here, but a little goes a long way with cured hams.
The secret to grilling ham is to use indirect heat to make sure it cooks all the way through without drying out. Using indirect heat lets ham pick up a nice grilled flavor, while it cooks, slowly releasing the fat, while shedding water to create a deeply flavored, incredibly juicy ham.
The ideal way to set up the grill is to have the area where the ham is sitting warm enough to cook it all the way through, without having it so hot that it turns into a briquette. When it comes to temperature our target is 250℉ (121℃) in the area where the ham is sitting.
On a gas grill, we recommend setting the ham on the grate in the middle of the grill and setting the outside burners on medium. For charcoal grills, it is usually easier to generate the right cooking temperature by piling the coals on one side of the grill and setting the ham on the other.
A good sign that the grill is at the right temperature is when the fat on the outside of the ham starts to glisten but doesn’t turn runny.
Since the ham starts out ready to eat, it doesn’t need to be cooked to a specific temperature or for a certain amount of time. A good rule of thumb is around 20 to 25 minutes per pound to heat the ham all the way through to an internal temperature of 140°F (60℃).
Some recipes place the ham on a foil pan or wrap it in foil. We don’t recommend either. A part of why grilled ham is so delicious is the heat allows it to shed excess liquid as it cooks, concentrating its flavors. This is similar to why aged hams like country hams or Ibarra hams have such a rich flavor profile.
This is the same reason why we don’t recommend using a water pan when grilling a ham or cooking it using direct heat. We do recommend using a water pan if you’re smoking one to help regulate the temperature in the smoker.
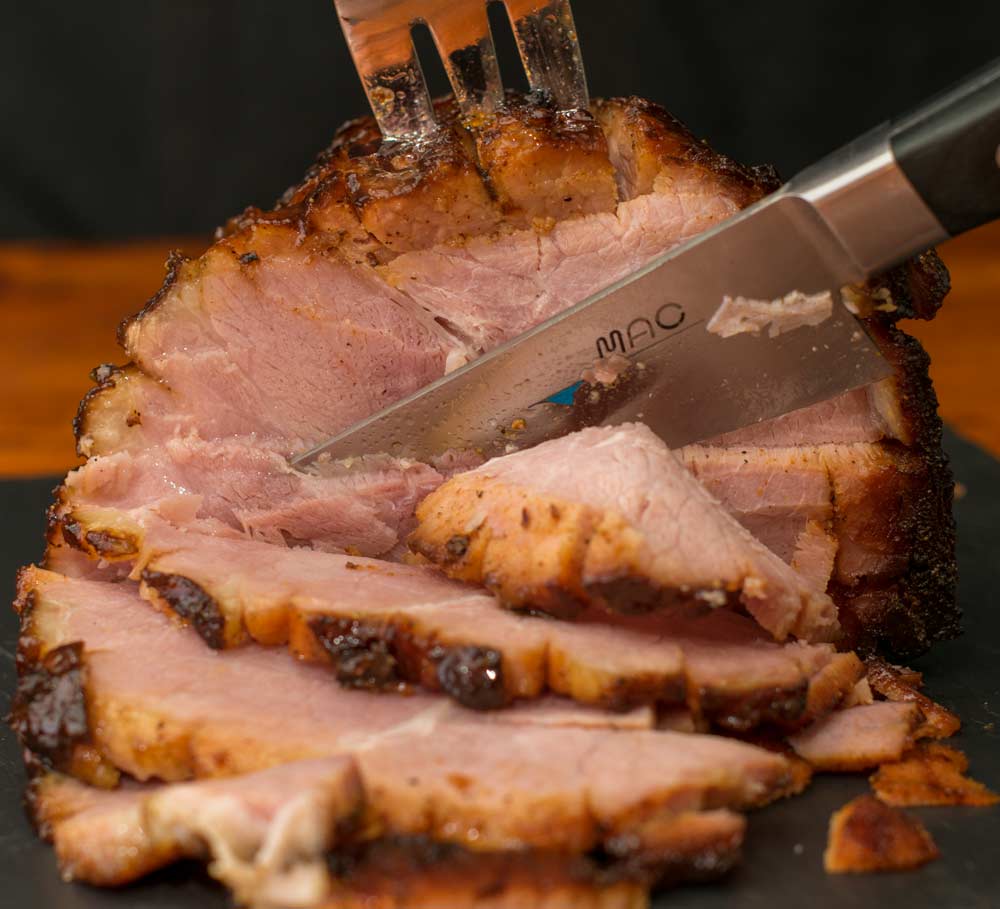
There’s no better way to finish a grilled ham than to glaze it. Glazing the ham is an easy way to add flavor while creating a crisp crust that also makes the ham look amazing.

The flavors in the maple bourbon glaze echo the smoked paprika and brown sugar in the spice rub creating a barbecued ham with deeper, more complex flavors and crisp outside that tastes as good as it looks.
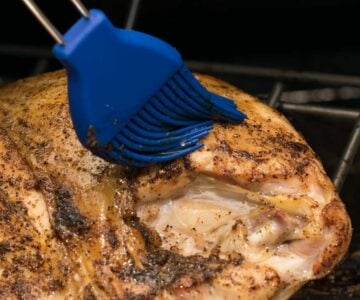
An easy way to keep this simple ham glaze warm between coats is to set the saucepan off the heat on the grill. We recommend using a silicone brush for its ability to get into all the nooks and crannies and because they’re easier to clean than traditional brushes.
To apply the glaze brush the outside of the ham, turning it so each side is coated. Let the glaze set for 10 to 15 minutes between each coat. The ham should be glazed at least three times with a few minutes of cooking time after the final coat to let the last layer set before taking it off the grill.

Our Maple Bourbon Glaze is also delicious with other cuts of pork, turkey, and salmon.
What to Serve with Grilled Ham
There are a lot of options when you’re cooking a ham on the grill. The ham can be served as the centerpiece to a nice dinner or set on a table or snack board for people to help themselves to slices of deliciousness at a big party.
One of our favorite things is to make delicious grilled ham & cheese sandwiches by piling thin slices of the ham along with slices of rich creamy cheeses like smoked gouda, Havarti, or cheddar on top of hand-sliced country bread toasted in a grill pan or panini press.
The simplest way to reheat grilled ham is in a covered baking dish set inside a 300℉ (149℃) oven for 15 to 25 minutes depending on the size of the leftover ham.
When it comes to side dishes, we love to use recipes that can be served family-style and have flavors that complement the smokiness of the ham and the sweetness of the glaze.
A few standouts include this creamy, cheesy, crowd-pleasing Cheesy Hash Brown Casserole, our take on traditional Creamed Corn, and lightly flavored Whole Roasted Brussels Sprouts. If you’re serving one for brunch try making these Cheesy Hash Brown and Ham Sandwiches.
When it comes to pairing the ham with drinks there’s nothing better than a Classic Old Fashioned for dinner or a pitcher of Homemade Bloody Mary’s for lunch or brunch.

Maple Bourbon Glazed Grilled Ham
Ingredients
- 3 to 5 lb ham
Dry Rub
- 1 tbsp brown sugar
- 1/2 tsp smoked paprika
- 1/2 tsp garlic powder
- 1/2 tsp mustard powder
- 1/2 tsp salt
- 1/2 tsp pepper
Maple Bourbon Glaze
- 1/3 cup bourbon
- 3 tbsp maple syrup
- 2 tbsp butter
Instructions
- Assemble the dry rub by mixing the brown sugar, smoked paprika, garlic powder, mustard powder, salt, and pepper together.1 tbsp brown sugar, 1/2 tsp smoked paprika, 1/2 tsp garlic powder, 1/2 tsp mustard powder, 1/2 tsp salt, 1/2 tsp pepper
- Using a sharp knife, make a series of crisscross cuts in a diamond pattern around 1/2 inch deep across the entire ham.3 to 5 lb ham
- Coat the ham in the dry rub, working it into the cut areas to help the flavors sink into the ham. This can be done a day or two before its cooked.
- Using indirect heat, grill the ham for 2 to 2-1/2 hours. The ham is done when its internal temperature has reached 140°F (60℃).
- While the ham is cooking, make the glaze by combining the bourbon, maple syrup, and butter in a small saucepan over high heat.1/3 cup bourbon, 3 tbsp maple syrup, 2 tbsp butter
- Stir the glaze while it comes to a boil. Lower the heat to medium-high and reduce the glaze for 10 minutes or until it starts to thicken.
- Using a brush apply the glaze to the outside of the ham, turning the ham, so each side is coated. Let the glaze set for 10 to 15 minutes between each coat. The ham should be glazed at least three times with a few minutes of cooking time after the final coat to let the last layer set before taking the ham off the grill.
- Let the ham rest for 5 to 10 minutes under a foil tent before serving. When slicing the ham, try and cut it so each slice comes includes a bit of the outside that has been glazed.
Recommended Equipment

Mark is an experienced food writer, recipe developer, and photographer who is also Umami’s publisher and CEO. A passionate cook who loves to cook for friends, he can often be found in the kitchen or by the grill testing new recipes.
More Info About Mark Hinds
Learn More
Find more recipes, tips, and ideas about these techniques, ingredients, and cuisines.
Techniques:
- Barbecue
- ·
- Grilling
- ·
- Roasting
- ·
- Slow Cooking
Ingredients:
- Bourbon
- ·
- Brown Sugar
- ·
- Ham
- ·
- Maple Syrup
- ·
- Pork
- ·
- Smoked Paprika


Leave a Reply